How to optimize images for Shopify (short answer)
To optimize images for Shopify, export each product photo as a square 2048×2048 px JPG in the sRGB color space, compress it to roughly 75–85% quality so it lands in the low hundreds of KB, remove EXIF and GPS metadata, and give it a descriptive filename before uploading. Shopify then serves smaller, resized copies through its CDN to each device.
That is the whole recipe. The rest of this guide explains why each number was chosen, how to handle exceptions such as transparent graphics, banners and iPhone HEIC photos, and how to run the recipe on an entire catalog at once. If you also sell on Amazon or Etsy, the product image optimization hub shows how one master set feeds every channel.
- 2048 × 2048Recommended product image size
- 20 MBDocumented maximum file size
- 20 MPDocumented maximum resolution
- sRGB JPGSafe upload format for photos
What size should Shopify product images be?
Shopify recommends 2048×2048 px for square product images. At that size the zoom and lightbox features in most themes have enough pixels to show texture and stitching, and the image still downsizes cleanly for collection grids and thumbnails. Going larger rarely helps shoppers and only makes uploads heavier.
Square matters as much as size. Most themes display product cards in a uniform grid, and when one photo is portrait and the next is landscape the grid either crops them unpredictably or leaves uneven gaps. Picking one ratio for the whole catalog, usually 1:1, keeps cards aligned. Cropping and framing for that square is covered in detail in the guide to resizing product photos into consistent squares.
Other image roles follow your theme rather than Shopify itself. Slideshow and hero banners, collection headers and logo slots each have sizes defined by the theme's documentation, so check those before exporting banners and keep them in a separate folder and preset. If an upload is rejected, start with the fixes for Shopify images that are too large.
JPG, PNG or WebP for Shopify?
JPG is the right upload format for product photos. It is universally supported, compresses photographic detail well and keeps your files small. Shopify's image CDN generates resized versions and can deliver modern formats such as WebP to browsers that support them, so you get most of the benefit of WebP without having to manage it yourself.
PNG is worth uploading only for images that need transparency or have hard edges and flat color, such as a logo, a size chart or an icon. A product photo saved as PNG is usually several times larger than the same photo as JPG with no visible gain. If a supplier sent PNG product shots, convert photographic PNGs to JPG before uploading.
Uploading WebP directly is supported and fine if your source files are already WebP, and converting JPG masters to WebP is worth it for images you host elsewhere, such as a blog or landing page outside Shopify. For the trade-offs between the two modern formats, see AVIF versus WebP for web images.
Typical file size for the same product photo
How much should you compress Shopify images?
Images are usually the heaviest part of a Shopify product page, and the main product photo is often the Largest Contentful Paint element that Google's Core Web Vitals measure. Compression shrinks that download without changing pixel dimensions. For product photos, a JPEG quality between 75% and 85% is generally indistinguishable from the original at normal viewing size and in zoom.
A better habit than one global quality value is a KB budget per image role, because a white-background shot of a mug compresses far smaller than a detailed fabric close-up. With compression to a target file size, the encoder finds the highest quality that fits the budget, so simple images are not over-compressed and detailed ones are not bloated.
The budgets below are practical starting points, not Shopify rules. Adjust them after checking zoom on your own products.
Starting points for Shopify image budgets
| Image role | Pixel size | Format | Starting KB budget |
|---|---|---|---|
| Main product photo | 2048 × 2048 | JPG, sRGB | 200–400 KB |
| Gallery angle or detail | 2048 × 2048 | JPG, sRGB | 150–350 KB |
| Variant swatch or thumbnail | Theme-dependent, often small | JPG | Under 100 KB |
| Banner or slideshow | Per theme documentation | JPG | 300–500 KB |
| Logo or size chart | As small as stays sharp | PNG or SVG where supported | As small as possible |
Shopify upload limits and what Shopify does to your images
Shopify documents a maximum of 20 MB and 20 megapixels per image, which is roughly 4472×4472 px for a square. Those are ceilings, not targets. A 2048×2048 image is about 4.2 megapixels and comfortably inside them, and anything far larger only slows your uploads and admin.
After upload, Shopify stores your original and generates the sizes each theme requests, delivering them through its CDN. It does not fix a poor crop, a wrong color profile or a dark photo, and it keeps the original filename in the image URL, so what you upload is still what defines quality, color and naming.
Shopify does not need EXIF metadata for anything a shopper sees. Strip it in the same export, which removes camera details and any GPS location from public files.
Why convert Shopify images to sRGB?
Recent iPhones and many mirrorless cameras record color in Display P3, a wider gamut than sRGB. Modern browsers read the embedded profile, but resized copies, social previews, email campaigns and product feeds do not always keep or honor it, so a saturated red dress or teal bottle can render duller or shifted in some places and correctly in others.
Converting to sRGB at export makes the result predictable: the color you approved on your Mac is the color every shopper, feed and marketplace sees. It is also why it pays to convert from the original master rather than from an already-processed copy; each extra conversion and JPG re-save is another chance for banding in smooth gradients such as studio backdrops.
If your catalog includes files from a print workflow, such as CMYK TIFFs from a supplier, convert those to sRGB JPG before upload as well. CMYK images can look noticeably off on screen.
Built-in Mac options: Preview, Finder and Shortcuts
For a few images, macOS has enough. Preview can open a multi-image selection, resize every image at once with Tools › Adjust Size, and export to JPEG with a quality slider. Finder's Convert Image Quick Action converts selected images to JPEG, PNG or HEIF at preset sizes. Shortcuts can chain resize and convert actions if you want a repeatable button.
Where they fall short for Shopify is exact square output from mixed-ratio photos, compressing to a size budget, metadata control and naming by product. That is fine for five photos and slow for five hundred. If your images come straight off an iPhone, the batch HEIC to JPG guide covers the conversion step alone.
Batch Shopify image optimization in Operimage
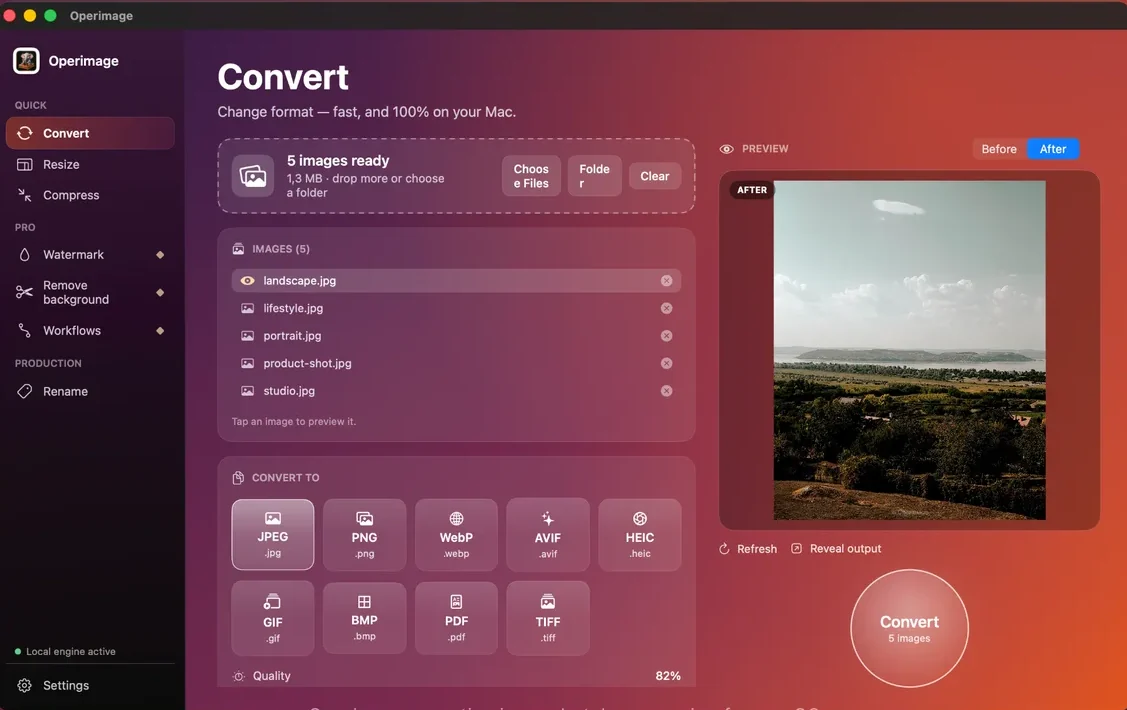
Operimage, a free Mac app, handles the whole Shopify recipe on-device. Drop a folder of product photos onto the window (for example 120 images ready), and use the tools in order: Convert to JPEG at around 80% quality, Resize with Manual resize to 2048×2048, Compress with a target file size and metadata stripping, then Rename with the Shopify pack.
Every tool shows a Before/After preview for the selected image, so you can check a dark product, a reflective one and a very tall one before running the batch. Originals are never overwritten unless you choose to, and Reveal output opens the finished folder in Finder, ready to drag into the Shopify admin's media uploader.
Naming Shopify images before upload
Shopify keeps the uploaded filename in the image URL, and Google treats descriptive filenames as a small hint about image content. A pattern such as product-handle-color-angle.jpg, for example linen-shirt-sage-front.jpg, is readable for your team, helpful for search and easy to match to products when you import with a CSV.
Apply the name in the same batch as conversion so files never exist as IMG_4821.jpg in your upload folder. The full set of patterns, including variant and sequence rules, is in the guide to naming product photos by SKU and variant. Remember that alt text, which you add per image in the Shopify admin, is what screen readers and Google rely on most.
- Use lowercase and hyphens: linen-shirt-sage-front.jpg rather than Linen Shirt (Sage) FRONT.jpg.
- Lead with the product handle or SKU so files sort by product.
- Add a zero-padded sequence (01, 02) when gallery order matters.
- Keep marketing words such as best or new out of filenames.
Shopify image checklist before you upload
Run through this list on a sample of the exported folder, especially your most detailed or most awkwardly shaped products. Fixing a preset now costs minutes; re-uploading a whole catalog costs an afternoon.
Shopify upload check
- Product photos are 2048 × 2048 px and square
- Files are sRGB JPG, mostly a few hundred KB
- Zoom on a detailed product still shows texture without blocky artifacts
- Transparent graphics are PNG; photos are not
- EXIF/GPS metadata is stripped
- Filenames are lowercase, hyphenated and product-specific
- Originals remain untouched in the source folder
Troubleshooting Shopify image problems
If something looks wrong after upload, the cause is almost always in the export settings rather than in Shopify.
- Blurry zoom: the uploaded file was smaller than 2048 px or was resized twice. Re-export from the master.
- Uneven collection grid: products have mixed ratios. Re-export every product as a 1:1 square.
- Dull or shifted colors: the file kept a Display P3 or Adobe RGB profile. Convert to sRGB.
- Slow product pages: images are multi-MB. Recompress to a KB budget; a free Mac image compressor can process the whole folder.
- Black background on a logo: a transparent PNG was converted to JPG. Keep that asset as PNG.
Step by step
Drop the product folder into Operimage
Drag a folder of product photos onto the window or click Folder. Group hero shots, gallery angles and swatches in separate folders if they need different settings.
Convert to JPEG
In Convert, choose JPEG as the output and set the quality slider around 80%. HEIC, PNG, TIFF and WebP sources all become JPG in one run.
Resize to 2048 × 2048
In Resize, use Manual resize with width and height of 2048 px. Choose fit to keep the whole product or fill to crop to an exact square, and check the Before/After preview.
Compress to a size budget and strip metadata
In Compress, enable Target file size and enter your KB budget, keep JPEG output and turn on metadata stripping to remove EXIF and GPS data.
Rename with the Shopify pack and export
In Rename, pick the Shopify e-commerce pack, confirm the live name preview, then run it and click Reveal output to open the finished files in Finder.
Save the steps as a Workflow
Save convert, resize, compress and rename as a Workflow so every new product drop is processed with exactly the same settings.
Ways to prepare Shopify images on Mac
| Path | Batch control | Size budget | Naming and export logic | Best fit |
|---|---|---|---|---|
| Browser converter | Medium | Sometimes | Low | Quick one-off file changes |
| Preview or Finder Quick Actions | Low to medium | No | Basic | A few images at a time |
| Operimage workflow | High | Yes, Target file size | High, Shopify rename pack | Repeatable Shopify catalog preparation |
FAQ
What is the best image size for Shopify products?
Shopify recommends 2048×2048 px for square product images. That size supports zoom in most themes and downsizes cleanly for collection grids and thumbnails.
JPG or WebP for Shopify?
Upload JPG for product photos. Shopify's CDN can serve modern formats such as WebP to supporting browsers automatically, so converting product photos to WebP yourself is optional.
How much should I compress Shopify images?
A JPEG quality of about 75–85% usually looks identical to the original. For a 2048 px product photo that typically means a few hundred KB, with smaller budgets for thumbnails and swatches.
What is Shopify's maximum image size?
Shopify documents a maximum of 20 MB and 20 megapixels per image, roughly 4472×4472 px. Stay well below that; 2048×2048 is the recommended size.
Does Shopify compress images automatically?
Shopify generates resized versions for each display size and serves them through its CDN, but it works from your upload. Uploading an already well-compressed, correctly sized sRGB JPG gives you predictable quality.
Can I upload iPhone HEIC photos to Shopify?
Convert HEIC photos to JPG first for the most predictable color and compatibility. A batch converter on Mac can turn a whole folder of HEIC files into sRGB JPG in one run.
Can I compress my whole Shopify catalog at once?
Yes. Put product photos in one folder, then convert, resize, compress and rename them in a single batch on your Mac, and save the steps so the next product drop runs the same way.