What size is a YouTube thumbnail in 2026?
A YouTube thumbnail should be 1280 × 720 pixels with a 16:9 aspect ratio. YouTube's minimum width is 640 pixels, and the uploaded file must be under 2 MB. YouTube's help page lists JPG, GIF and PNG as accepted image formats. These requirements have been stable for years and still apply in 2026.
YouTube has said it is raising the thumbnail file limit to allow larger, higher-resolution images, but availability depends on the account and the rollout, so 2 MB is still the number to design for. A 1280 × 720 JPEG fits comfortably under it.
Custom thumbnails also require a verified YouTube account; if the Upload thumbnail option is missing in YouTube Studio, verify the channel with a phone number first. Producing thumbnails for a weekly channel is a good fit for batch image tools on a Mac: the size, crop and compression rules never change.
- 1280 × 720Recommended size in pixels
- 16:9Aspect ratio, same as the player
- 640 pxMinimum width
- < 2 MBMaximum file size
Why 1280×720 and 16:9 matter
YouTube shows the same thumbnail at many sizes: large on the home feed on a TV or desktop, medium in a phone feed, and small in the Up next list. At 1280 × 720 there is enough resolution to look sharp on large screens, and the image downscales cleanly for small slots. Uploading at 640 × 360, the minimum, can look soft on a TV or a high-resolution laptop. Other networks size their images around different screens, as the image size guide for every social platform shows, but YouTube stays with the 16:9 shape of its player.
The 16:9 ratio matches the video player and the thumbnail slots across the site. A thumbnail in any other shape is letterboxed with black bars or cropped. Higher-resolution 16:9 images such as 1920 × 1080 are accepted as long as the file stays under 2 MB, but they do not look noticeably better in most placements and are harder to keep under the limit.
Design at 1280 × 720 or larger from the start rather than enlarging a small image at the end. A thumbnail built at 640 × 360 and scaled up to 1280 × 720 has the right dimensions but none of the extra detail, so text edges and faces still look soft on big screens.
- Minimum640 × 360 · 640 px wide
- Recommended1280 × 720 · 16:9
- Full HD (still under 2 MB)1920 × 1080 · 16:9
JPG or PNG for YouTube thumbnails?
JPG is the right default for almost every thumbnail that contains a photo or a video frame. At 1280 × 720 and 85–90% quality, a JPEG is typically a few hundred kilobytes, far under the 2 MB limit, and the compression is invisible at thumbnail size.
PNG is lossless, which keeps flat colors and sharp text perfectly clean, but it is a poor fit for photographic content. The raw pixel data of a 1280 × 720 image is about 2.8 MB, and a busy photo saved as PNG often stays above 2 MB, which YouTube rejects. If your design tool exports PNG by default, convert PNG thumbnails to JPG before uploading. Frames saved from a browser as WebP should likewise become JPG; the guide to turning WebP files into JPG covers that.
JPG
Default
- Small files, easily under 2 MB
- Ideal for faces, video frames and photos
- Use 85–90% quality to keep text edges clean
PNG
Flat graphics only
- Lossless; crisp text and solid colors
- Photo-heavy PNGs can exceed 2 MB
- Best for simple illustrated or text-only designs
Verdict: Export JPG unless the thumbnail is mostly flat color and text and the PNG stays under 2 MB.
Safe zones: what YouTube covers on your thumbnail
Parts of every thumbnail are covered by YouTube's interface. The video duration badge sits in the bottom-right corner on every placement. On desktop, hovering shows Watch later and Add to queue icons near the top-right. Once someone has watched part of a video, a red progress bar runs along the bottom edge.
Design around those overlays. Keep the main text in the left two-thirds or the vertical center, keep faces away from the bottom edge, and never put the key word of a title in the bottom-right corner.
- Bottom-right: duration badge; keep it empty of text and faces.
- Top-right on desktop: hover icons; avoid small details there.
- Bottom edge: progress bar on partly watched videos.
- Edges in general: some placements crop slightly, so leave a margin of roughly 5% on each side.
Design tips that survive small screens
Most views come from phone feeds and side lists, where a thumbnail can be a few hundred pixels wide or smaller. A design that works at 1280 pixels on your monitor can be unreadable at that size. Test by shrinking the thumbnail to about 320 × 180 and judging it from arm's length.
Clear thumbnails usually share a few traits: one focal point, three to five words of large text at most, strong contrast between subject and background, and colors that differ from YouTube's own white or dark interface. If you use YouTube's Test & Compare feature to try several thumbnails on one video, every variant must still meet the same 1280 × 720, 2 MB specification.
- One focal point: a single face, product or object reads faster than a collage at small sizes.
- Short text: three to five words, set large; the video title already appears beside the thumbnail.
- Contrast: separate the subject from the background with light, color or an outline.
- Consistency: a repeated layout, font and color across a series makes videos recognizable in a crowded feed.
- Honesty: the thumbnail should show what the video delivers; misleading thumbnails hurt watch time and can break YouTube's policies.
- Dark and light mode: check the design against both a white and a near-black background, since viewers see either.
Thumbnail check before upload
- Exactly 1280 × 720 pixels, 16:9
- File under 2 MB, ideally a few hundred KB
- Readable when shrunk to about 320 × 180
- Bottom-right corner free of text and faces
- Exported in sRGB so colors match across devices
- File named after the video so it is easy to find in Studio
How to make a 1280×720 thumbnail with Preview on Mac
For a single thumbnail, Preview on macOS is enough. Open the image, drag a selection while watching the size readout until it is close to 16:9, and choose Tools → Crop. Then choose Tools → Adjust Size, keep Scale proportionally checked, and set the width to 1280 pixels; if the crop was exactly 16:9, the height becomes 720. Finally choose File → Export, pick JPEG, and move the Quality slider while watching the file size estimate until it is comfortably under 2 MB.
The weak point is the crop. Preview has no aspect-ratio lock, so getting exactly 1280 × 720 means typing values and checking the result, and every thumbnail repeats the whole routine. Photos on macOS can crop to a 16:9 preset, which is more precise, but it is still one image at a time.
Once you upload, the path in YouTube Studio is Content → select the video → Details → Thumbnail → Upload file. If you are replacing thumbnails on an older catalog, preparing all the files first and naming them after each video makes that step quick.
How to batch export YouTube thumbnails on a Mac
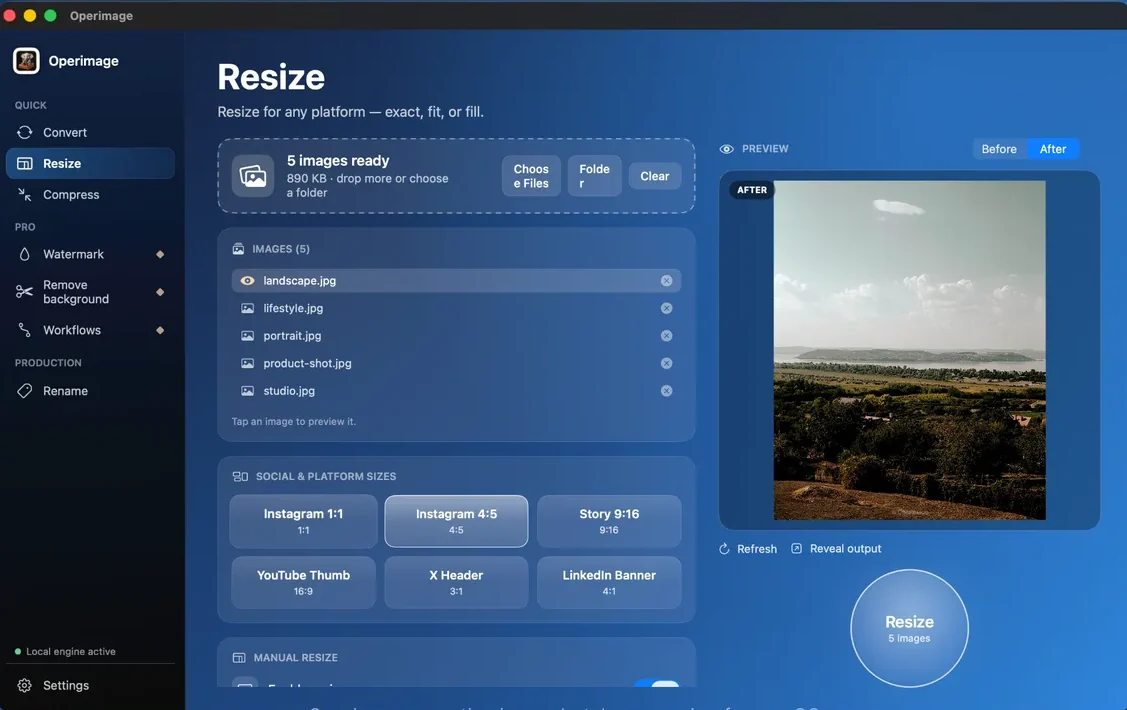
Creators who publish several videos a week, or who refresh old thumbnails in bulk, save time by treating thumbnails as a batch. Operimage, a free Mac app, has a YouTube Thumb 16:9 preset in its Resize tool. Drop in your thumbnail art, select the preset or type 1280 × 720 under Manual resize, and choose Fill so every file covers the full frame with no black bars. The Before/After preview shows exactly how each image is cropped.
Next, open Compress and choose JPEG with a target file size, for example 1.5 MB, so every thumbnail is guaranteed to pass the limit with room to spare. Operimage's target size option searches for the best quality that fits; the guide to compressing to an exact file size explains how that works. Everything runs on your Mac, so unreleased video artwork is never uploaded anywhere but YouTube.
A repeatable thumbnail workflow
The goal is that a new thumbnail takes one drag and one click. In Operimage you can save the whole sequence as a Workflow, such as resize to 16:9, compress under 1.5 MB, then rename, and rerun it on each new folder of designs. For general Fit and Fill behavior and other sizes, see the Mac batch resizing walkthrough.
If the same video is promoted on social media, generate vertical and portrait versions from the same artwork; the guide to Instagram feed and Story sizes lists those dimensions. Finally, rename thumbnails in bulk to match the video title or upload date, so the right file is easy to find in YouTube Studio.
- 1Thumbnail designsMixed sizes from your editor
- 2Resize with Fill1280 × 720, 16:9
- 3CompressJPEG, target 1.5 MB
- 4Renamevideo-title-thumb.jpg
Troubleshooting thumbnail uploads
Most thumbnail problems come down to size, ratio or account status. Work through these before redesigning anything.
- File too large: re-export as JPG instead of PNG, or compress to a target size under 2 MB.
- Black bars around the thumbnail: the image was not 16:9. Resize with Fill to 1280 × 720.
- Blurry thumbnail: the source was smaller than 1280 × 720 and got enlarged. Rebuild it at full size.
- No option to upload a custom thumbnail: the channel is not verified yet. Verify it in YouTube Studio.
- Colors look different after upload: export in sRGB rather than Display P3 or a CMYK profile.
- Thumbnail rejected after upload: YouTube checks thumbnails against its community guidelines; misleading or graphic images can be removed.
Step by step
Load your thumbnail art in Resize
In Operimage, open Resize in the sidebar and drop in your thumbnail designs or the folder they live in.
Choose the YouTube Thumb 16:9 preset
Select YouTube Thumb 16:9 under Social & platform sizes, or use Manual resize with 1280 × 720, and set the mode to Fill so there are no black bars.
Check the crop and resize
Click through the list in the Before/After preview, confirm faces and text stay inside the frame, then click Resize.
Compress under the size limit
Open Compress, choose JPEG, and set a target file size such as 1.5 MB, or a quality around 85–90%, then click Compress.
Reveal output and upload
Use Reveal output to open the finished thumbnails in Finder, then upload each one in YouTube Studio under Thumbnail.
FAQ
What is the correct YouTube thumbnail size in 2026?
1280×720 pixels at a 16:9 aspect ratio, with a minimum width of 640 pixels. The file must be under 2 MB.
What is the YouTube thumbnail file size limit?
2 MB is the standard limit. YouTube has said it is allowing larger files for higher-resolution thumbnails, but 2 MB remains the safe target for every account.
What aspect ratio should a YouTube thumbnail be?
16:9, the same as the video player. Any other ratio is letterboxed with bars or cropped.
Should I use JPG or PNG for YouTube thumbnails?
Use JPG for thumbnails with photos or video frames, because it stays well under 2 MB. Use PNG only for flat graphics and text that still fit under the limit.
Can I upload a 1920×1080 thumbnail?
Yes, any 16:9 image at least 640 pixels wide is accepted if it is under 2 MB. 1280×720 is recommended because it looks sharp everywhere and is easy to keep small.
Why can't I upload a custom thumbnail on YouTube?
Custom thumbnails require a verified channel. Verify your account with a phone number in YouTube Studio, then the Upload thumbnail option appears.
Why does my thumbnail have black bars?
The image was not 16:9. Resize it to 1280×720 with a Fill or crop setting so the artwork covers the whole frame.